Generate PDFs async with Bubble API
This article presents a solution for generating PDFs asynchronously using Bubble and Bubble API. It addresses the need for asynchronous PDF generation due to the 30-second time limit imposed by Bubble on the plugin.
For asynchronous PDF generation requests, we put the incoming requests in a queue upon receiving them. This allows us to generate the PDFs later without needing to hold onto the request.
Once the PDFs have been generated, we will notify your Bubble API/backend workflow with the generated PDFs.
*Thanks to Arthur from pocstudio.fr for helping with the steps of the Bubble API/backend workflow
Here are the steps to set up asynchronous PDF generation for Bubble:
1. Enable Workflow API
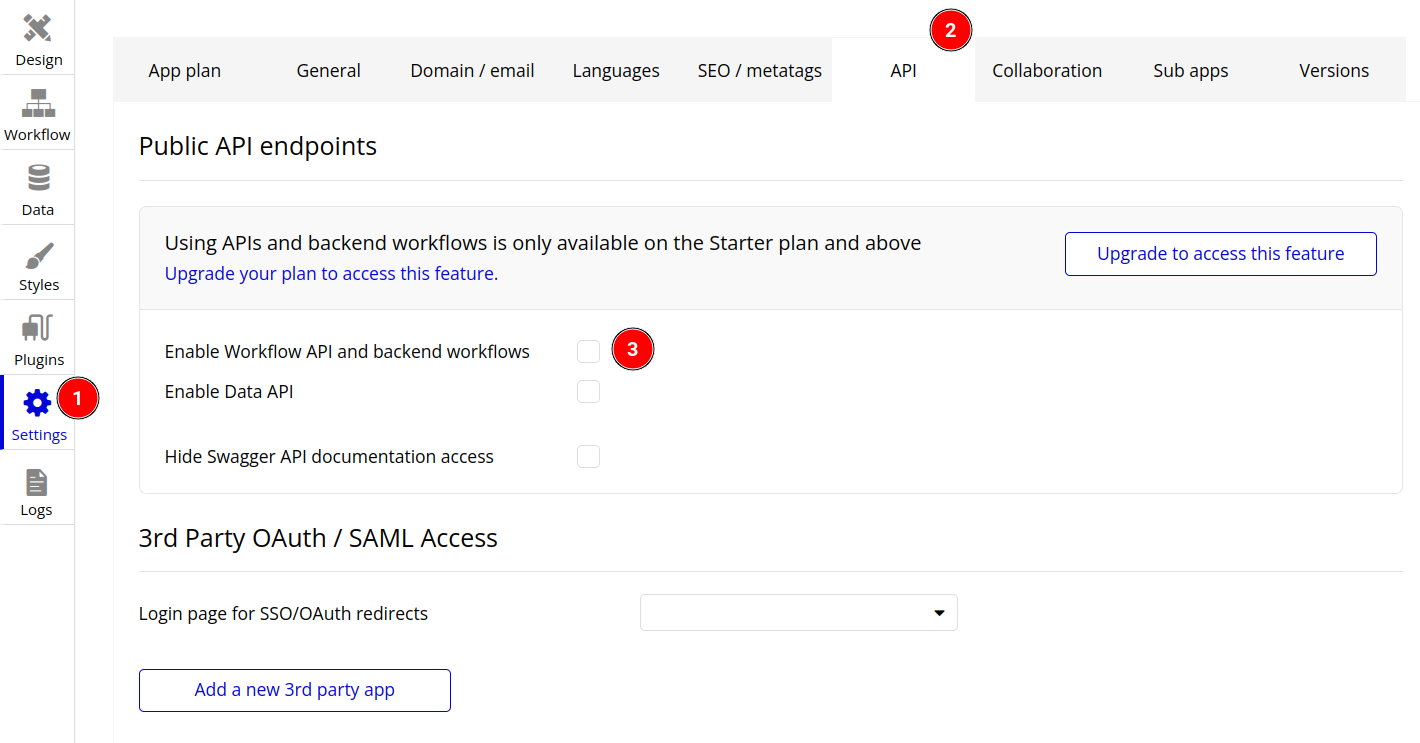
To process the PDFs generated, we first need to enable a public Bubble API endpoint first.
Step 1. In Settings then API tab, make sure Enable Workflow API and backend workflows is enabled.
Using APIs and backend workflows is only available on the Starter plan and above
2. Setup the workflow for the API
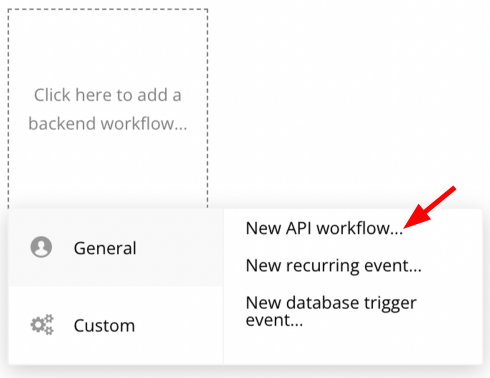
Now is to create a backend workflow to handle the generated PDFs
Step 2. Navigate to Workflow tab and select General then New API workflow
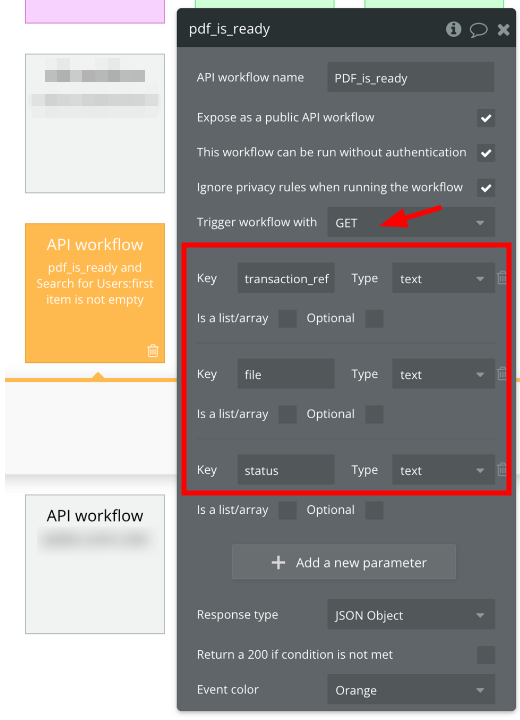
Step 3. Setup the trigger with the following information:
Trigger workflow with GET and add the keys transaction_ref, file and status
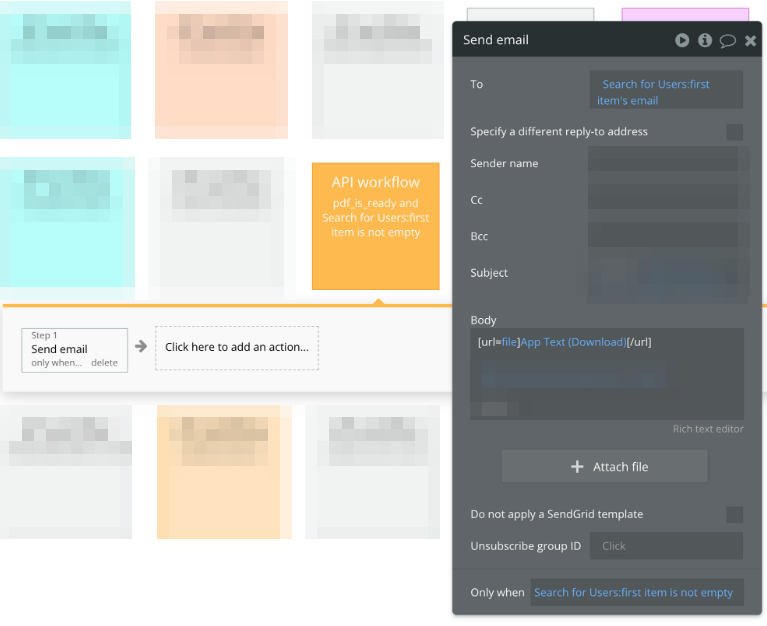
Step 4. Add a subsequent action, such as sending an email with the PDF to your user. Use the Send email action and customize the values according to your project requirements.
* if you have saved the transaction ref in Step 6 for the users, you may use it to search for the user in the backend workflow.
3. Setup a Bubble action and button to generate PDF
Once you have setup a Bubble API and backend workflow, the next step is to create an action to generate PDF.
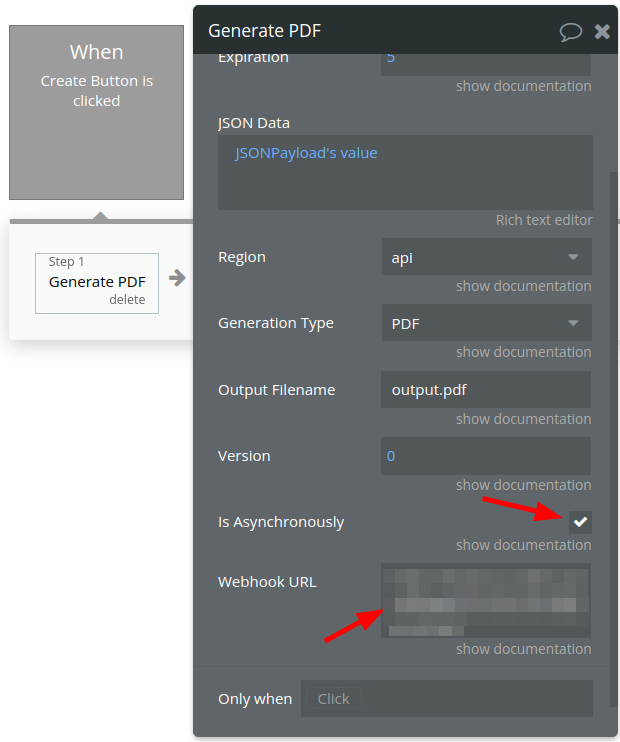
Step 5. Create a Generate PDF action(Button click) in Bubble and make sure Is Asynchronously is checked. Next, paste the webhook URL in the Webhook URL field.
The Webhook URL should look something as follows: https://[your-app-bubble-name].bubbleapps.io/version-test/api/1.1/wf/[the_name_of_your_workflow]
Once everything works in dev mode, make sure to remove the version-test in the URL of your webhook where you generate the PDF and you’re ready to go.
Note: To append additional information such as email, use key-value pairs in the query string of the Webhook URL. For example: https://[your-app-bubble-name].bubbleapps.io/version-test/api/1.1/wf/[the_name_of_your_workflow]&email=test@test.com
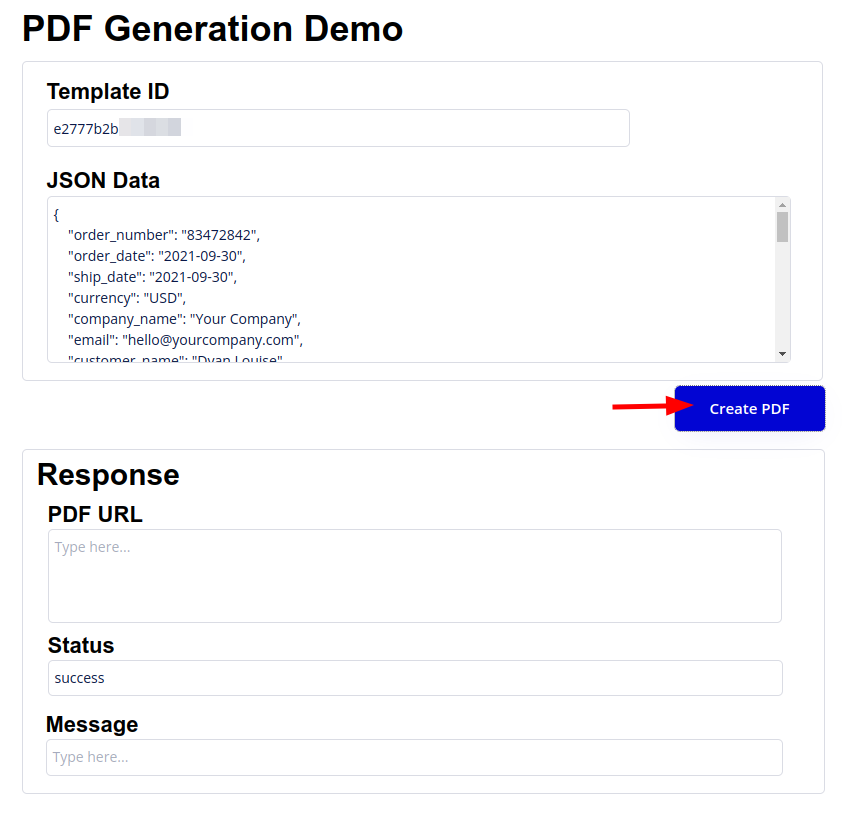
Step 6. Once the Bubble action is ready, click on the Preview button to preview your Bubble application. To generate a PDF asynchronously, click on the button that generate the PDF. We will return a transaction ref immediately to you,
* You may save the transaction ref in the database and associate the transaction ref to the user, the transaction ref can be used to identify the user once we notify the Bubble API/backend workflow.
Step 7. The click action will send an asynchronous PDF generation request to CraftMyPDF. Once the PDF has been generated, we will notify your Bubble API and its backend workflow with the generated PDF.