Zapier Automation
Zapier is a powerful automation tool that allows you to connect different apps and services together, enabling seamless data transfer and workflow automation.
Zapier is a web-based platform that allows you to create integrations, known as "Zaps", between different applications. With thousand of supported apps, including popular tools like Gmail, Slack, Trello, and Salesforce, Zapier provides an extensive range of possibilities for automation.
Video tutorial of generating PDFs with Zapier and CraftMyPDF
Watch the video below for a quick walkthrough of the entire setup process, from connecting your account to generating your first automated PDF.
Steps to automate PDF generation
In this tutorial, we will focus on using Zapier to automate PDF creation using the CraftMyPDF app.
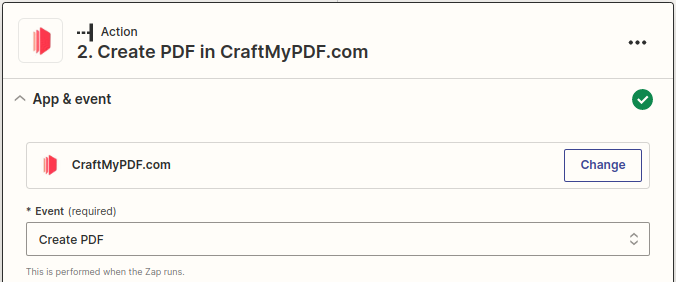
- To get started, the first step is to choose CraftMyPDF as the app and select "Create PDF" as the event within Zapier.
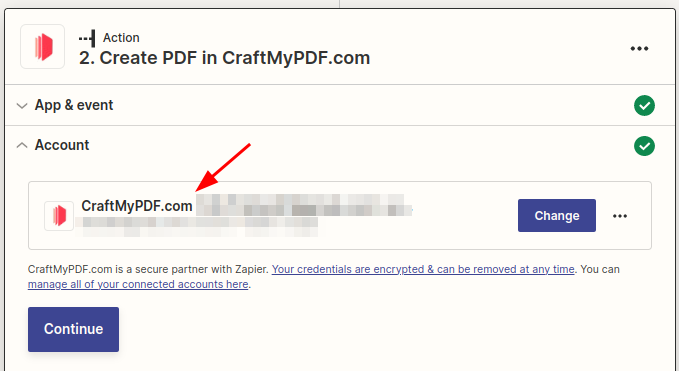
- Once you've selected the event, you need to link your CraftMyPDF account using the API key.
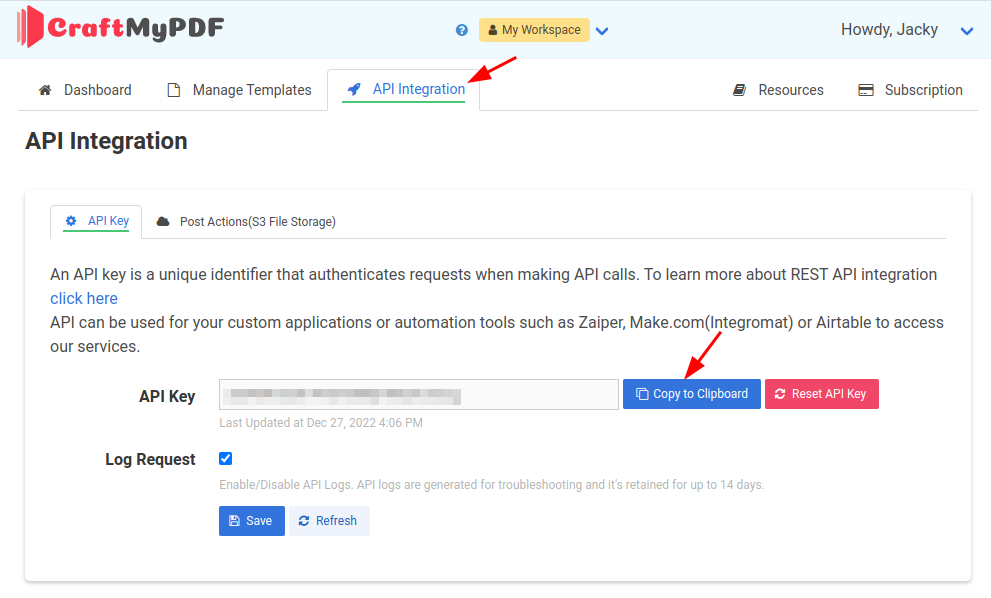
The API key can be obtained from the CraftMyPDF dashboard's API Integration tab. This key acts as a secure access point to your CraftMyPDF account, allowing Zapier to interact with it on your behalf.
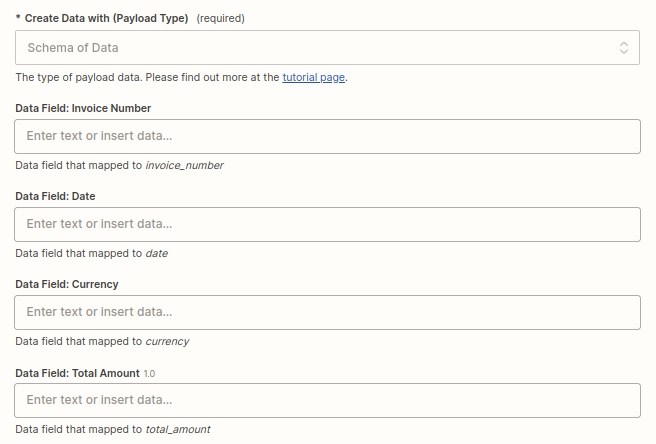
- After successfully connecting your account, then proceed to set up your action, choose your template, then select Payload type
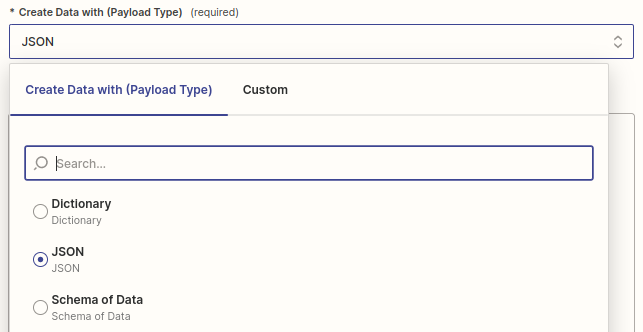
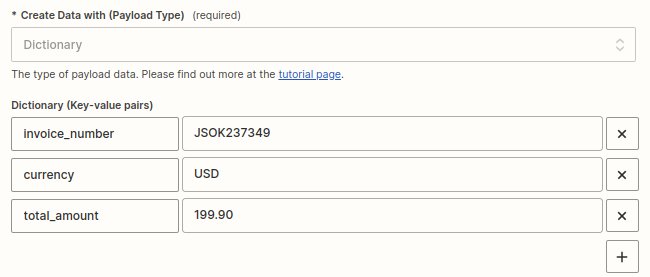
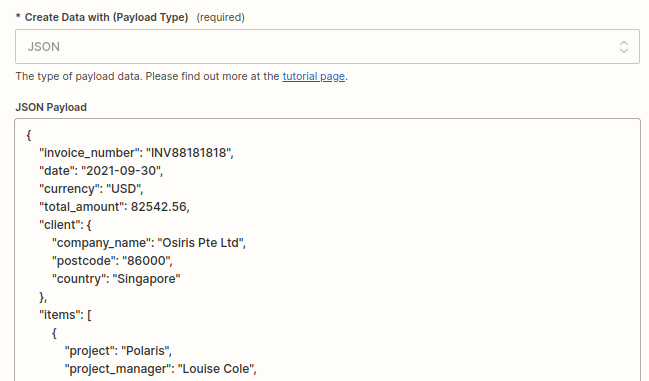
There are three options for the payload:
i. Schema of Data(Recommended): This option automatically generates input fields based on the sample data in the Data tab of the template editor. It simplifies the process of creating payload data by providing a straightforward way to define the required information.
ii. Dictionary: A dictionary consists of simple key-value pairs for flat-structured JSON. Each key-value combination maps the key to its corresponding value. This option is useful when you have a relatively simple data structure that can be represented as a set of key-value pairs.
iii. JSON data: This payload type is suitable for complex hierarchical data represented in JSON format. JSON data can include strings, numbers, objects, arrays, booleans, or even null values.
Update Fillable Components in a PDF with Zapier
This guide explains how to update fillable components in a PDF using Zapier. It walks you through two key processes:
- Extracting the field keys from your PDF and
- Obtaining the fillable PDF's URL.
By following these steps, you can easily integrate your PDF forms into your Zapier workflow.
i. How to Find the Keys for the Fields
To find out the field ids in a PDF, please visit https://craftmypdf.com/tools/pdf-fillable-field-reader/
Step 1. First drag and drop your PDF file into the upload area or click “Choose file” to select one from your device and it will analyze your PDF and display all interactive fields automatically.
Step 2. The PDF pages are displayed with blue overlay boxes marking fillable fields.Click a blue box to highlight it (red border) and see its details on the right.
Step 3. Click on the Copy .value (Zapier to copy the key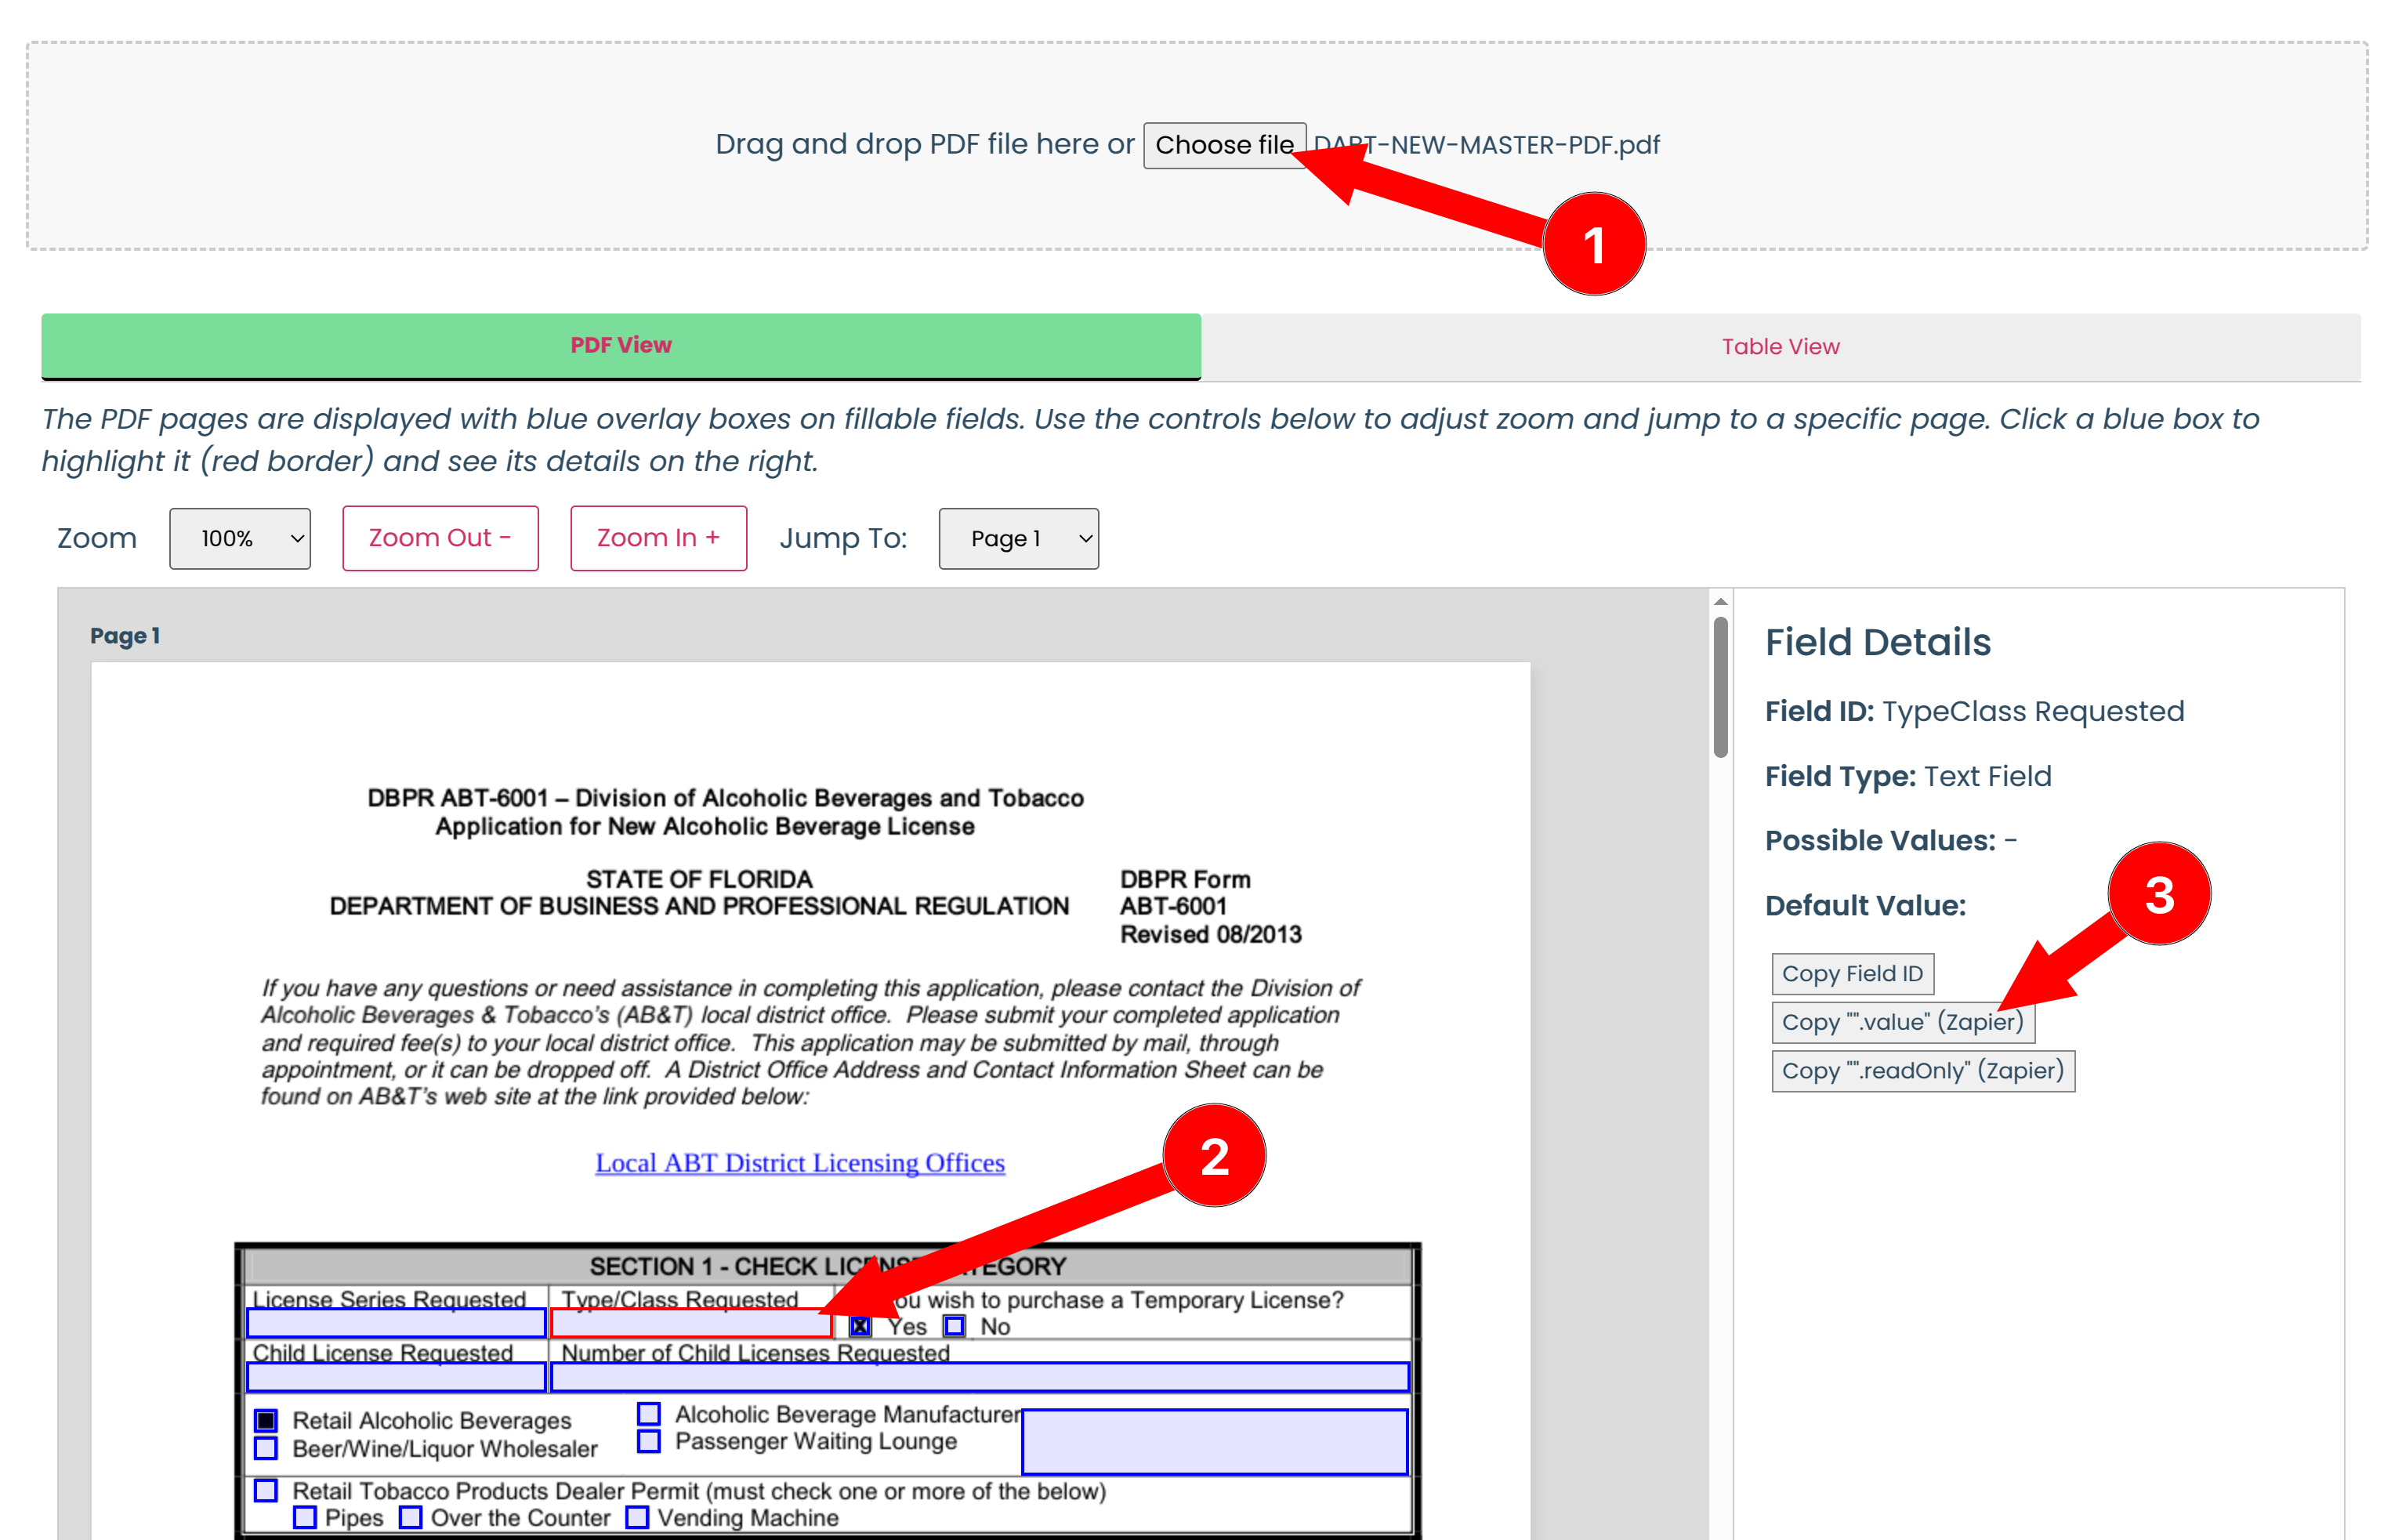
Step 4. Paste the key into the Fields in Zapier(on the left) as follows:
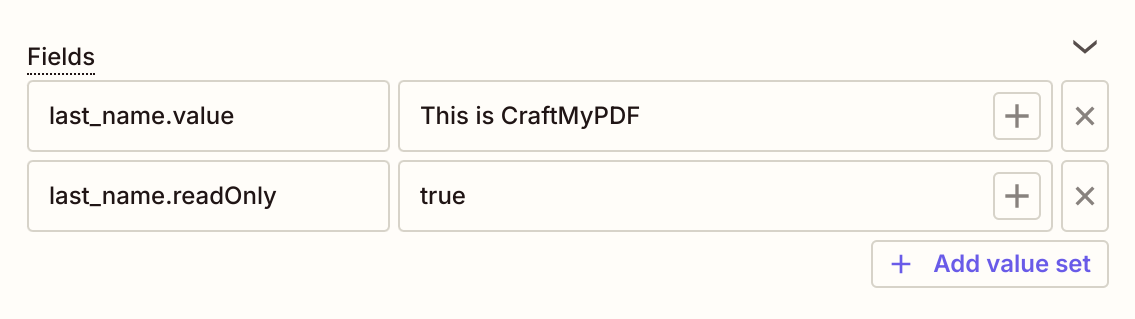
Note:
Please use the following format for the keys in your Zap:
[Field ID].valueto fill the value[Field ID].readOnly(true/false)
For example the field id is last_name, use the key last_name.value to fill the value and last_name.readOnly to make the field readOnly
ii. How to Obtain the PDF URL for Your Fillable PDF
Step 1. In the “Manage Templates” tab, click on “New PDF Template from PDF file”. Select your PDF from your device and then click the “Edit” button to modify the template.

Step 2. Then select the PDF page in the template editor and
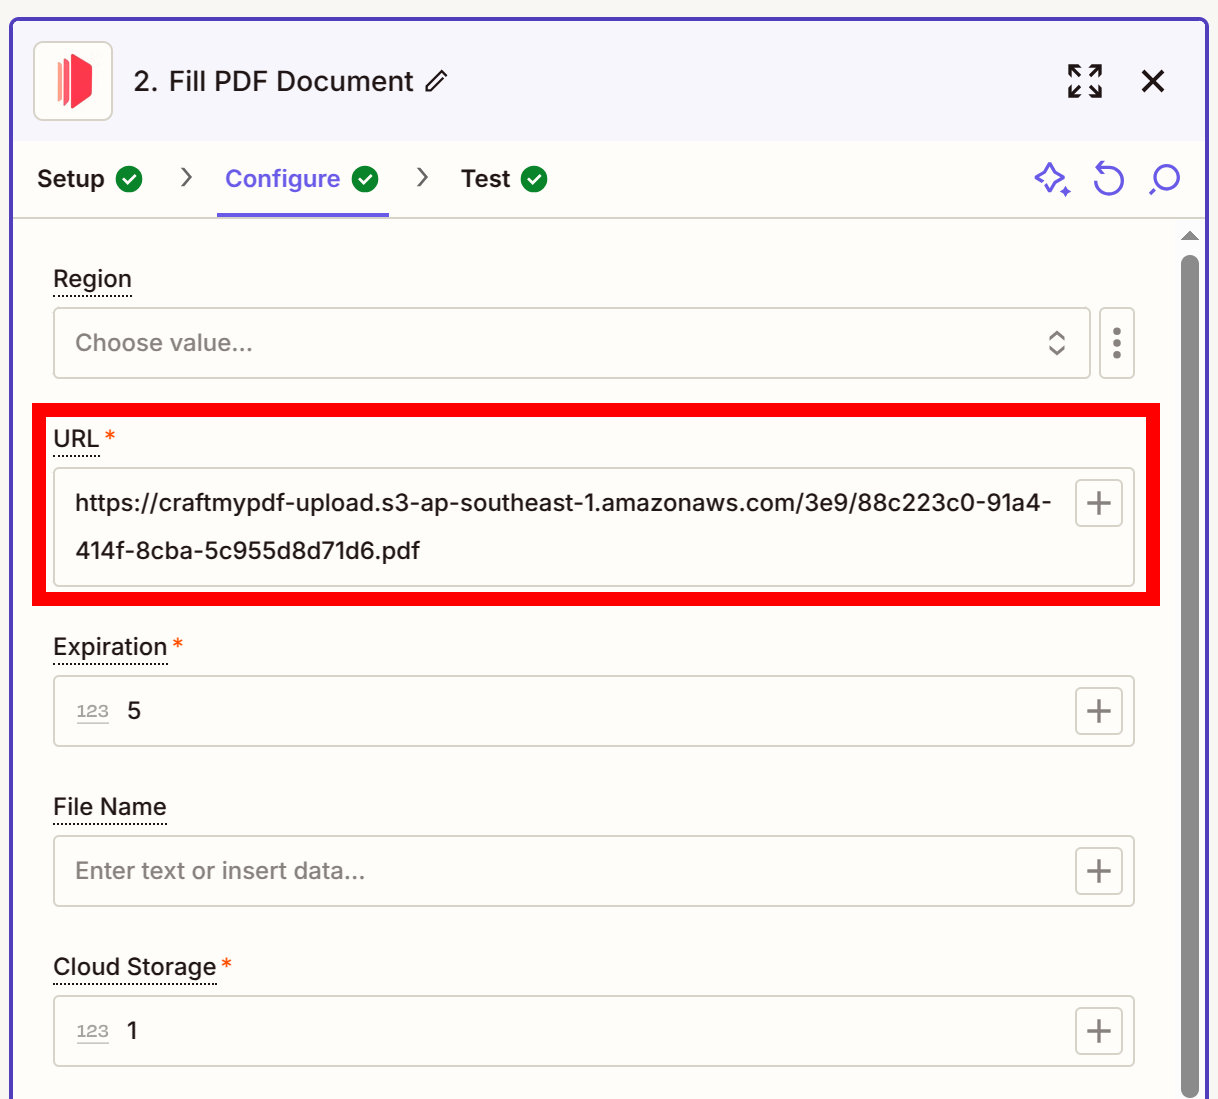
Step 3. Copy the URL from the PDF URL
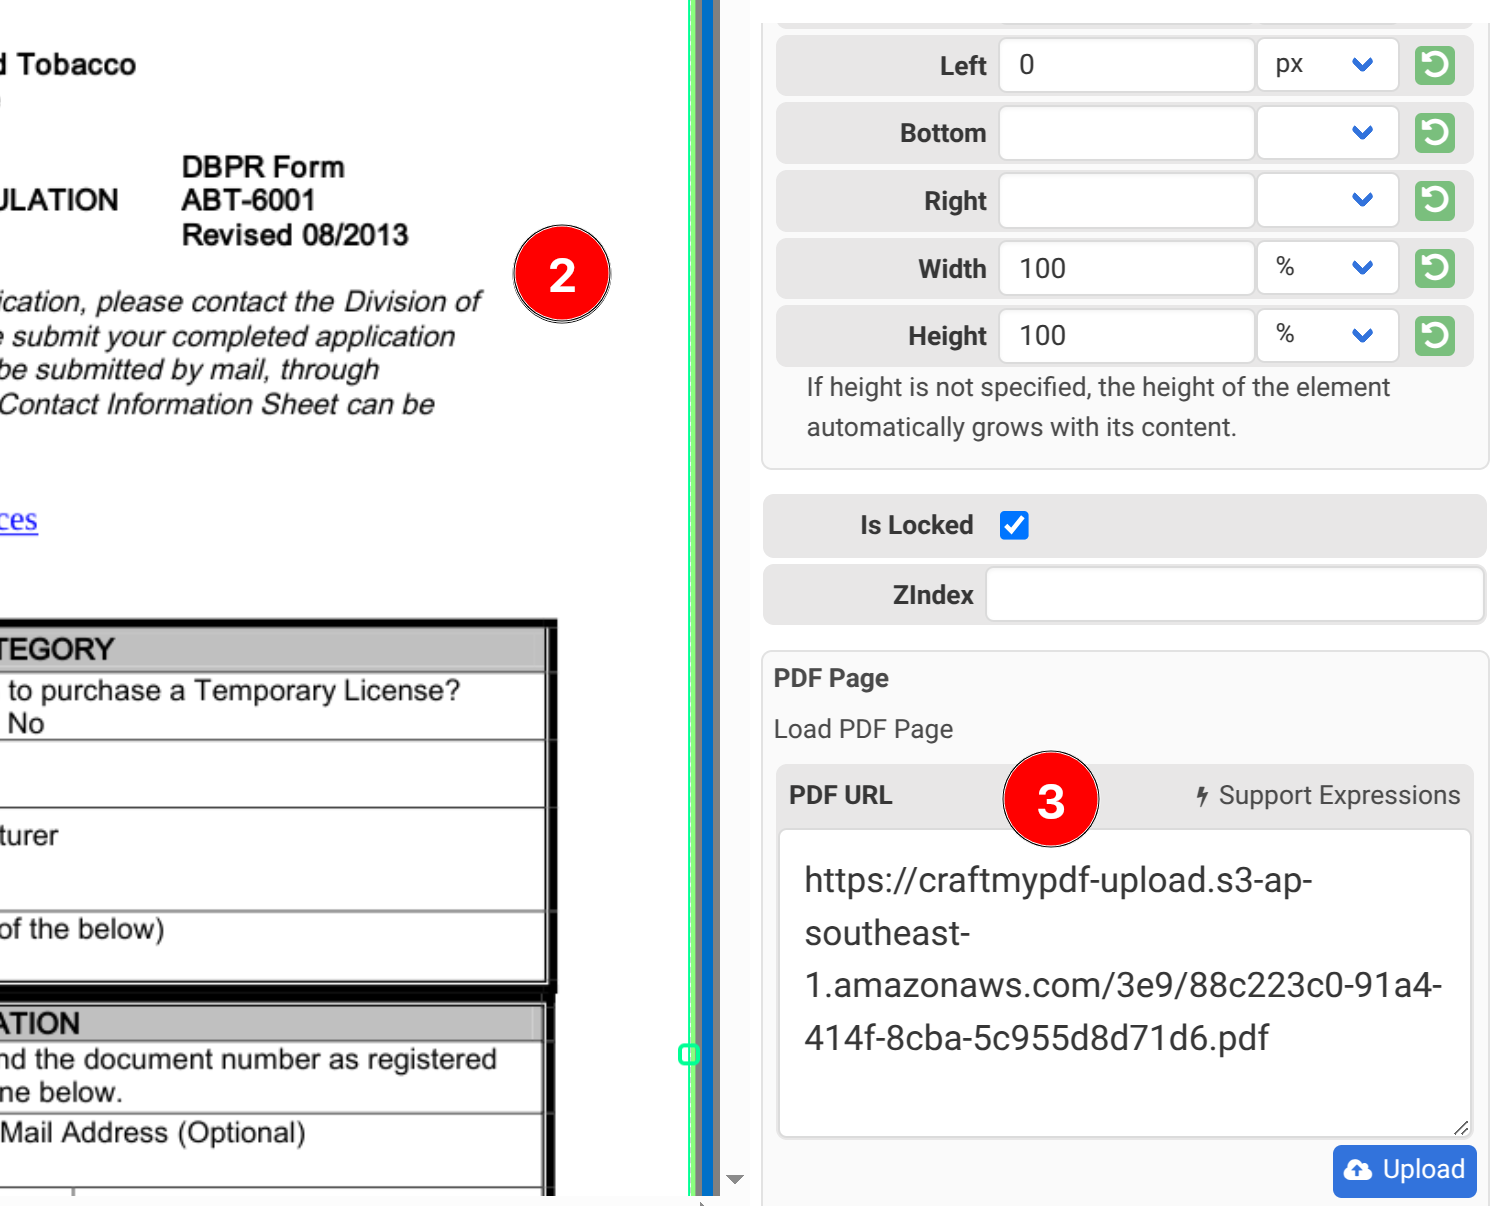
Step 4. Then paste the PDF URL into the URL in Zapier
Conclusion
By leveraging the power of Zapier and CraftMyPDF, you can automate the creation of PDFs based on various triggers and inputs.
Whether you need to generate reports, invoices, or other types of documents, Zapier's automation capabilities make it easy to streamline your workflow and save time.