Creating a multiple-page PDF
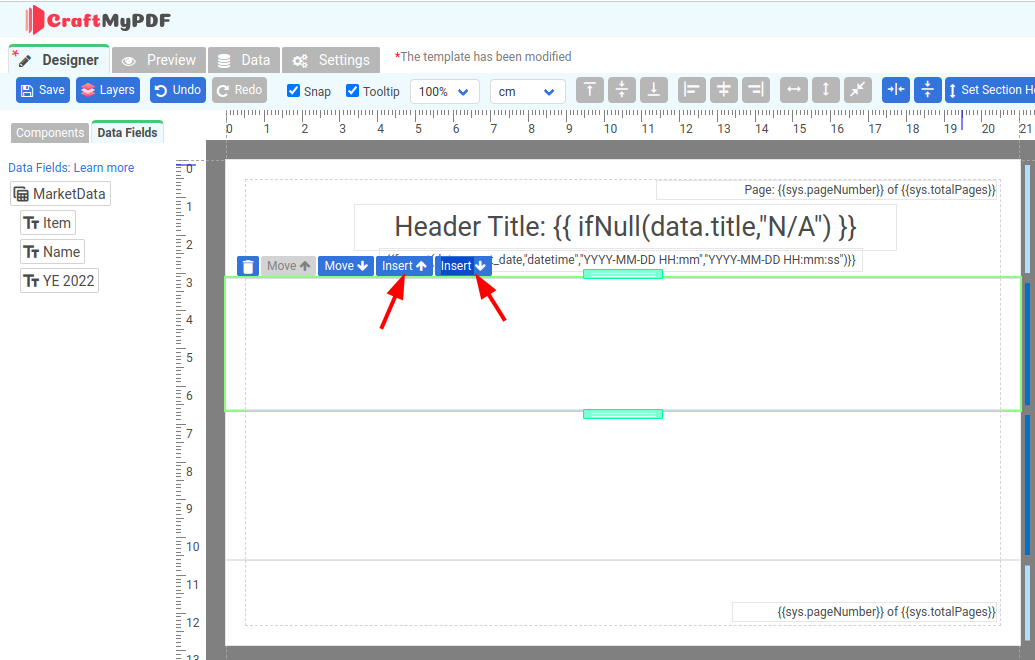
To create a multi-page PDF, first, you have to create a new section by clicking the “Insert Above” or “Insert Below” buttons. You can find these buttons as shown below.

After that, we can use multiple normal sections by adjusting the section height (to match the page body height) and adding page breaks to create a multi-page PDF template.
Each normal section can be a page. The following are two methods to create a multi-page PDF using multiple normal sections.
Method 1: Use Page-Fit mode(Recommended)
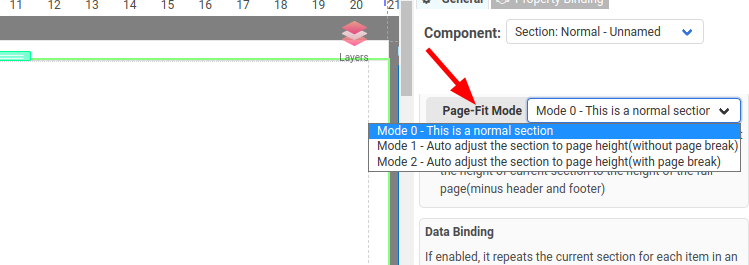
It’s recommended to use Page-Fit Mode to make a full page PDF, the followings are the steps:
Step 1: Select a normal section
Step 2: In the property panel look for the property Page-Fit Mode, select either Mode 1 or Mode 2. Once either Mode 1 or Mode 2 is selected, the designer automatically adjusts the height of the section to full-page during the design mode.

Method 2 - Set Section Height to Page Height
Each normal section can be a page – as long as you adjust its height to the page body height.
Step 1: Click on a normal section to select the section.
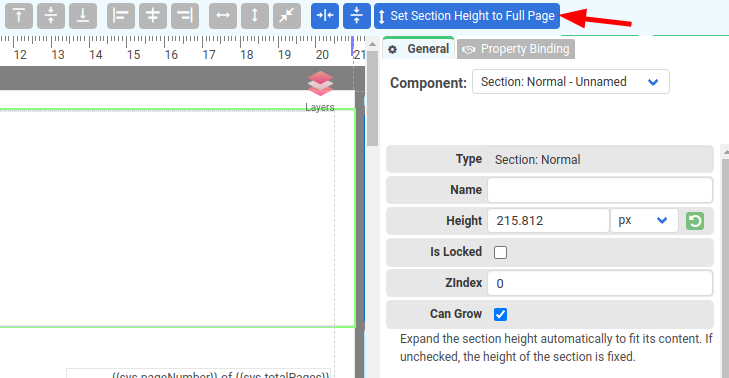
Step 2: Next, in the upper toolbar click on the Set Section Height to Page Height button.

The button Set Section Height to Page Height does 2 things:
(1) It automatically adjusts the height of the section to the height of page body height (Without the header and footer’s height).
(2) If the selected normal section is not the last normal section, the property Page Break After of the selected section is set to true. This will ensure the rendered page has a page break. Otherwise, if the selected is the last normal section, the Page Break After property is set to false.
Whenever you add, remove or adjust the height of a normal section, you need to click on the button Set Section Height to Page Height to reinitialize the Page Break After and height. So, it’s recommended to add all the normal sections needed first and do it once altogether.
Find out more at here