Overview of template editor
The CraftMyPDF template editor is a design tool that allows users to create, modify, and customize PDF or image templates. A template refers to a pre-designed layout or format that serves as a starting point for creating various PDF documents, such as resumes, invoices.
Our template editor provides a user-friendly interface where you can edit the content, formatting, and design elements of a template. It offers a range of features, including drag-and-drop functionality, text formatting tools, image insertion, color and font selection, and more.
The goal is to empower users to tailor the template to their specific needs without requiring extensive technical or design skills.
Our template editor consists of five tabs:
- Designer tab
- Preview tab
- Data tab
- Settings tab
- Template Versions
1. Designer tab
The Designer tab is a drag-and-drop option for designing PDF templates.
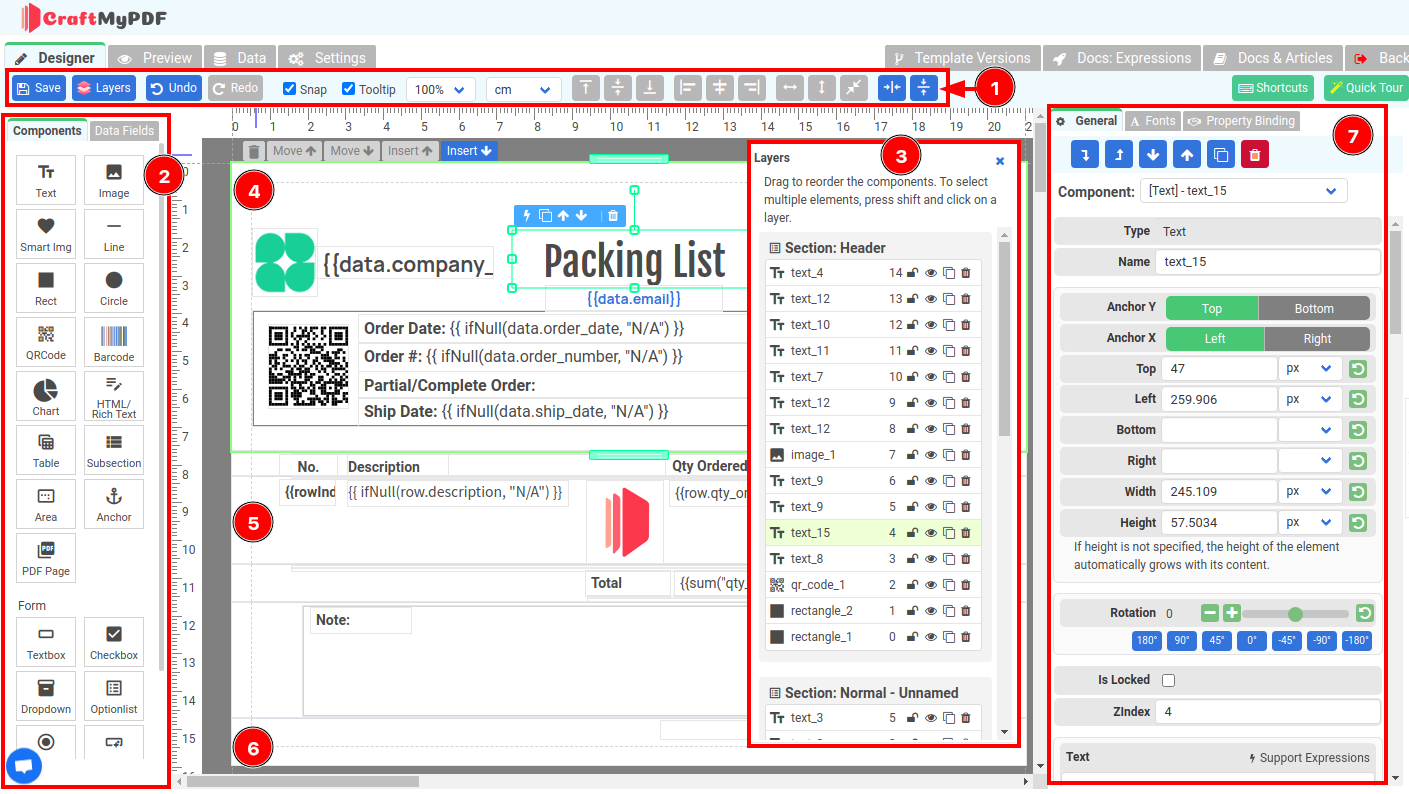
Area 1. Toolbar
A toolbar is a graphical user interface (GUI) element that provides easy access to various functions, such as save, undo, remove, and alignment, among others.
Area 2. Tool Panel
Each component in the toolbar is represented by an icon. You can drag and drop the components onto the editor area (sections). We support a wide range of components such as text/label components, image components, QR Code components, etc.
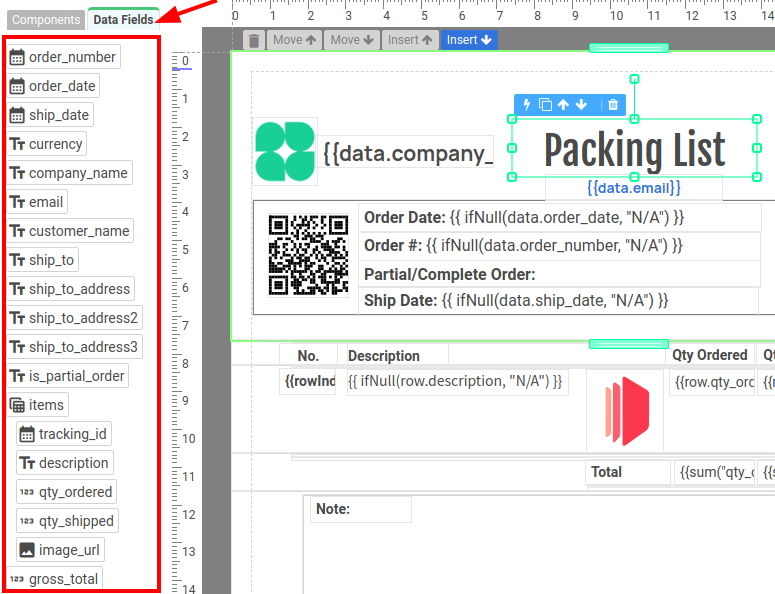
It also has a Data Fields that that allows you to create Label and Image components by dragging and dropping them into the editor sections
Area 3. Layers
Layers are an important feature in CraftMyPDF that enables users to work on individual components of a template without affecting other parts. They're like sheets stacked on top of each other, where you can create different elements on each sheet.
Here are a few things to know about layers:
Stacking Order: Layers are arranged in a stack in the Layers panel, which is usually on the right side of the screen. The order in the stack determines how the layers are viewed in the template – the top layer is always in front of the bottom layer.
Layer Visibility: Each layer has a visibility setting that you can toggle on or off. This allows you to make changes without permanently deleting anything.
Functions: In the Layers panel, you can choose to delete, hide, or clone components.
Understanding and effectively using layers is crucial, as they provide the flexibility and control needed for complex reports.
Area 4, 5, 6. Editor Area - Sections
The editor area is area where you can create components by dragging and dropping them from the toolbar, positioning components, and resizing the section's height. There are three types of sections in the editor area: (a) Header Section (b) Normal Section (c) Footer Section
4) Header Section: The header section appears at the top of each page. It includes elements such as the page number, document title, and other relevant information.
5) Normal Section: The normal section constitutes the body of the report, where the report data is displayed.
6) Footer Section: The footer section appears at the bottom of each page. It typically contains elements like the page number, document title, or other information.
Resources about sections and data-binding
- Learn more about the header, footer and normal section
- Learn more about data-binding for normal section
Area 7. Property Panel
The property panel in CraftMyPDF is a very useful tool that allows designers to customize various attributes of selected objects or controls in their template.
In the designer view, for example, you can select a text or image component, and the property panel will display all the properties of that component. This includes properties such as size, color, the text it displays, and its location on the template. You can directly edit these properties from the property panel.
2. Preview tab
This is where you preview the PDF.
The Preview tab enables you to visualize the PDF and debug any expressions you have used. Additionally, you can generate PDF documents directly from this tab. Two buttons are available for your convenience:
Preview Button
Previewing in HTML is fast. However, this renders in one page without page breaks.Use this for debugging expressions or preview the data/layout. To render actual PDFs, use Generate PDF button.It automatically refreshes when you click on the Preview Tab.
Generate PDF
Click here to generate the actual PDFs. It typically takes a few seconds.The generated PDFs are accurately the same PDF that you generate with REST API, Zapier or Make.
3. Data tab
Here is the sample JSON data that used for preview your template. It is crucial to have your JSON data prepared before diving into the template design.
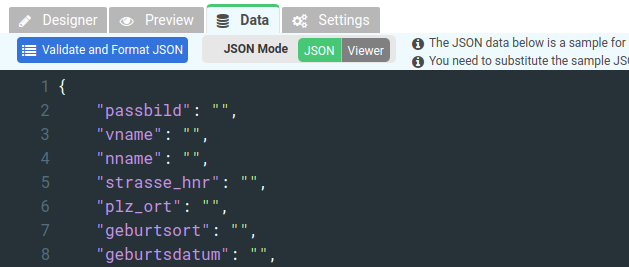
The data in the Data tab will be used for:
- The JSON schema of the sample data will be used in the Expression Builder
- The sample JSON data itself will be used for PDF preview.
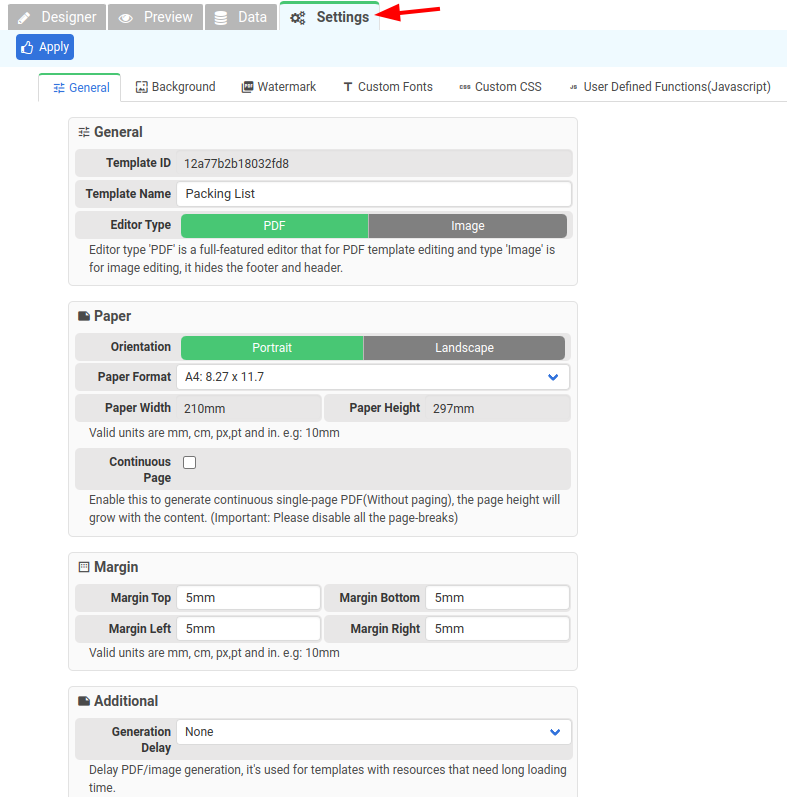
4. Settings tab
This is where you configure the settings of your template such as paper format, margins, template name, custom CSS etc
4.1 General (Paper format, size, orientation, margins)
The general tab is where you can configure the paper format, margins, and other settings.
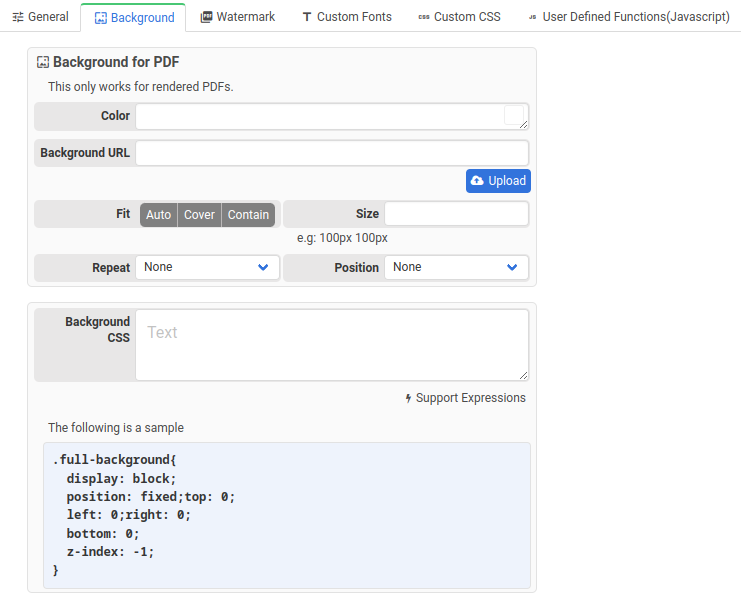
4.2 Background(Background image and color)
The background tab is where you can configure the background image, color and other settings of the template background.
* Please note that this works for the rendered PDFs, not in Preview(HTML)
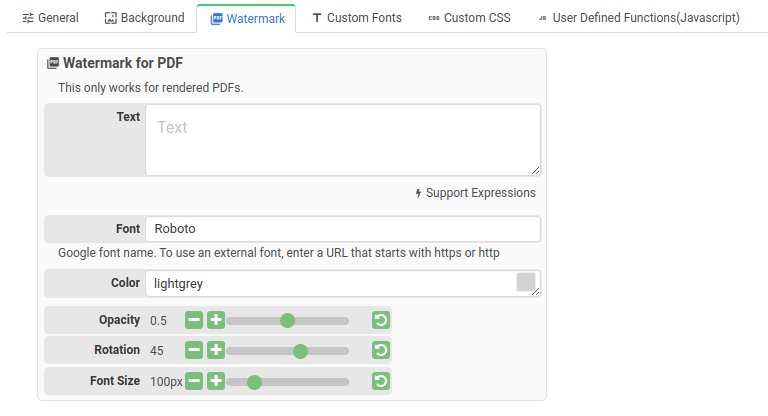
4.3 Watermark
The watermark tab is where you can configure the watermark of the template.
* Please note that this works for the rendered PDFs, not in Preview(HTML)
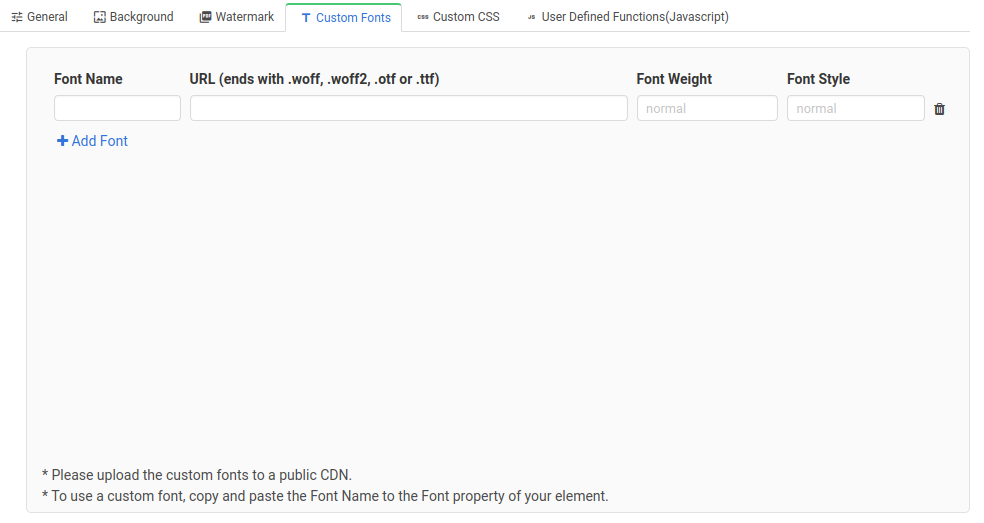
4.4 Custom Fonts
The custom fonts tab is where you configure custom fonts.
Please learn more about custom fonts here
4.5 Custom CSS
The custom CSS tab is where you configure your own CSS styles.
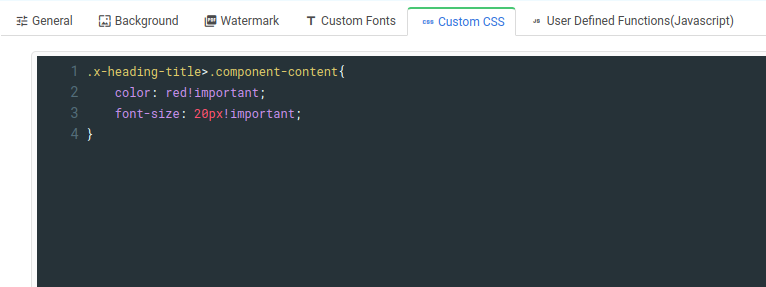
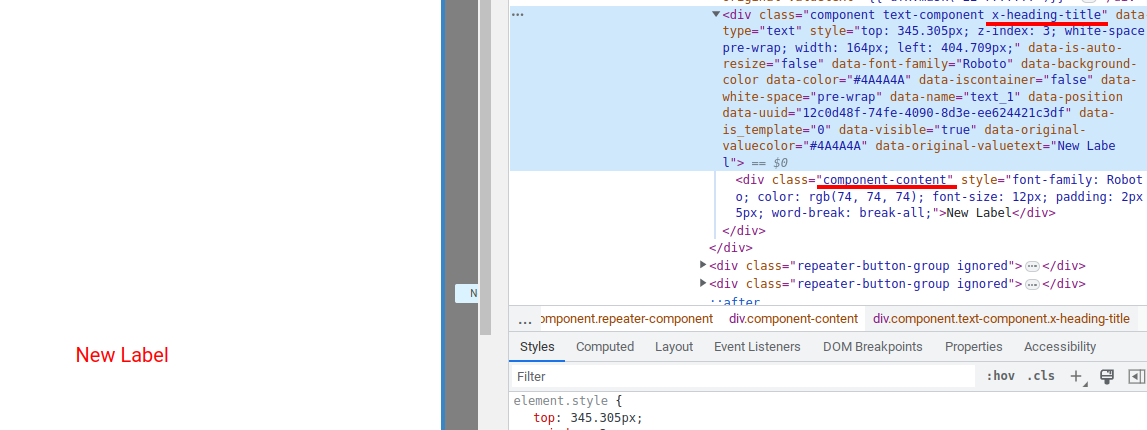
To apply the CSS, enter the CSS class name into the Custom CSS Classes in the property panel
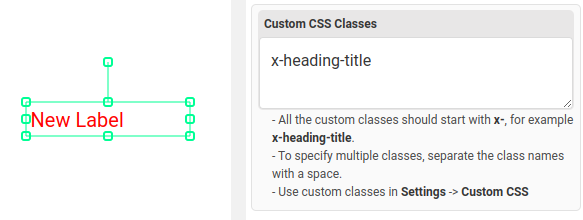
If you are unsure, please use Chrome Developer Tools to inspect the element in the Preview tab.
4.6 User Defined Functions(Javascript)
The User Defined Functions tab is for adding your own customized JavaScript code.
The JavaScript functions here are meant for performing basic operations such as data formatting and manipulation. It's important to note that asynchronous functions are not supported.
When using a user-defined function, always assign the function to a variable named "ufx.”
Here is an example
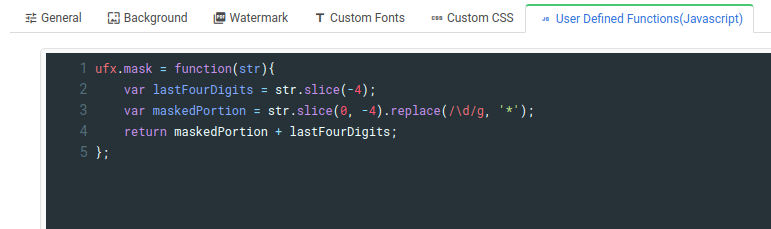
To use the function in the designer tab
{{ ufx.mask(data.bank_account) }}5. Template Versions(Template history)
The Template Versions tab displays the complete history of templates, with the latest version being shown.
- We retain only the 20 most recent items. To prevent a specific version from being purged, check the "Retain" box and optionally provide a description for that version.
- You can generate PDFs or images based on a specific template version.
- Don't forget to click the "Update Versions" button to refresh the information.
